Tuesday, November 1, 2011

Halloween I: Spoooky Ghost Cookies and Swamp Thing Wings

Halloween!

It's the best holiday all year. It's a time when you can dress up as anything that you want and are allowed to take candy from strangers. What could possibly be wrong with that?

Well if you live in the northeast, you'll know that we got snowed on which was not so Halloweeny. But that didn't stop me from making a couple of themed treats for Sunday Snack Day. We didn't actually watch any football because the Packers had a bi-week (is that even how you spell that?). I mean... I don't ever watch any football, but regardless.

I made some rolled sugar cookies with frosting in the shape of Spoooooky ghosts and tasty pumpkins. These were supposed to be for a party that got snowed out and Nathan and I did not eat all of them!


We also had some swamp thing wings which were good... though I think I might make them less swamp thingy next time!

Sugar Cookies with Frosting

some of my best attempts at frosting

Ingredients

1 1/2 Cups softened butter
2 1/4 Cups white sugar
4 eggs
2 tsp vanilla extract
5 Cups all purpose flour
2 tsp baking powder
1/2 Cup powdered sugar

Directions

Cream the sugar and butter together. Add eggs and vanilla. In a separate bowl, mix flour and baking powder together. Slowly add the flour into the butter mixture. Wrap in plastic wrap and chill overnight. I would wrap it in 4 separate balls, that way when you are rolling out dough, you can keep the dough you're not working with chilled.

Preheat your oven to 400. I actually did it to 395 because my oven runs a little hot, and I find that if I put it as hot as baked goods call for they always burn on the bottoms.

Roll out your dough on a piece of parchment paper to about 1/4 inch (this will make a soft cookie, roll thinner if you want it to be crisp).  This dough is pretty sticky so "flour" your parchment paper etc. with the powdered sugar. The dough is not super sweet, so the extra sugar is nice and also won't make your cookies extra floury.

Use a cutter of your choice and cut your cookies all at once. Peel away the excess dough. Move the parchment paper to your cookie sheet. This keeps your cookies from getting misshapen when you transfer them.

Bake about 5 minutes until the bottoms are lightly browned.

Sugar Cookie Frosting

haunted pumpkin patch
Ingredients

1 Cup powdered sugar
2 tsp milk
1 T corn syrup
extract of your choice (or none)
food colorings of choice

This is about 1/5 of the frosting you will need for the dough above. I made a bunch of small batches to make the different colors.

Directions

Mix all ingredients until smooth. Add more corn syrup to make more liquid, more sugar to make more solid. This is about right for the main portion of cookie. For details, make thicker

Spread with a knife or pipe with decorator tips. Allow to harden. Cookies can be stacked once hardened.

Swamp Thing Wings
these would look more appetizing without the food dye...

Ingredients
Package raw chicken wings, separated at joint, discard or save wing tips for stock
1/2 cup vegetable oil
1/2 cup soy sauce
1/4 cup honey
1 inch fresh ginger grated
2 cloves garlic minced
1 T oyster sauce
1/4 tsp black food dye
1 T cornstarch (optional)

Directions
Mix together all ingredients. Add chicken. Let marinade for at least an hour (I think overnight would be better), stirring periodically.

Heat a wok or deep skillet. Add in chicken, reserving marinade. Stir until chicken is cooked through, about 10 minutes.

If you'd like a thicker sauce, add cornstarch to reserved marinade. Stir into the hot wok until sauce is thickened.

These are really messy and honestly look kinda gross... but it's Halloween and that's kind of the point right? If I had any, I would have sprinkled some sliced scallions on top of these before serving. They do make a spoooky appetizer!

Tuesday, October 25, 2011

"Trenchers with Sauce"

Remember how last week I promised a Renaissance themed snack in honor of my trip to the faire? Well, I made mini-pita pizzas, but we can call them trenchers with sauce because that makes them sound ye olden.

Pita pizzas are delicious, easy, and can be topped with the stuff from your fridge. I used this as an opportunity to clear out some pits and pieces that otherwise would have probably gotten shoved to a back corner, grown some color of mold, and then been thrown out in my next fridge cleaning purge. In fact, even the mini-pitas were on the verge of going extremely stale/moldy. But instead they were eaten! Huzzah (as they say at the faire).

the girl who took this was not excited...
Pita Pizzas/"Trenchers with Sauce"

Ingredients

Shredded Cheese (I bought one of those Italian blends... retrospectively I should have just stuck with the mozzarella going moldy in the cheese drawer...)
Sauce. Ok.... so I didn't feel like going to the real grocery store, so I bought Ragu from Walgreens. I'm not proud of it.
Mini-Pitas... or regular size pitas and then you could cut them in wedges like regular pizza
Olive oil

Toppings: bell pepper, pepperoni, onion, other types of cheese, pineapple, ham, mushroom, olives etc. you can use what you like and have on hand.

Directions

Split your pitas in half to make two circles. This can be done by inserting the tip of a serrated knife and cutting all the way around. Place your pitas with insides facing upwards on a baking sheet. Brush with a little olive oil. I also sprinkled some italian seasoning on them.

Place under a low broiler for about 2 minutes or until golden. Toasting is an important step if you don't want super soggy pita pizzas.

mmmm golden brown
Cut up all of your toppings into tiny pieces. If you've got pepperoni, quarter the slices, that sort of thing. If you have kids or picky guests, you can let them top their own pitas. I have Nathan, so I just did it myself.
toppings arranged
Top with a heaping tablespoon of sauce, some cheese, and desired toppings. I then added more cheese because it is delicious!

Place under medium broiler until cheese is melty, about 2 minutes (keep an eye on it)

Let cool briefly and serve.

Now I really enjoyed these, but Nathan likes them better when made on an English Muffin. He likes soft doughy pizza, and I like think crispy pizza. So use what you like and go from there. These were quick and easy and can be used as a meal or an appetizer depending on how many people eat.

Tuesday, October 18, 2011

Non-traditional Dumplings

After Thanksgiving, I always suffer from an overabundance of particular foods. Try as I might, within a week I am SICK of turkey and stuffing and cranberry sauce. And sweet potatoes. This year I ended up with a tray and half of sweet potato casserole. Nathan and I are only two people... we can physically only eat so much sweet potato casserole!

We did manage to eat the half--it was made more like a pumpkin pie filling with this carmelized deliciousness on top and lots of spices and sugar in the potatoes. I mean, I guess I could have remade it into actual pie... but that seemed redundant.

The second was a more traditional sweet potato casserole with mashed sweet potatoes on the bottom and marshmallows on top. The potatoes themselves weren't too heavily seasoned (they tasted like they had butter in them) so I thought I could work with it and make it into a snack.

And thus:

Savory Sweet Potato Dumplings

Ingredients
Sweet potato casserole
pinch of: thyme, oregano, rosemary, garlic powder, salt, pepper
1/4 cup feta cheese
Gyoza skins or Wonton wrappers
Pam or other cooking spray

soy sauce (for dipping)

Directions
Preheat your oven to 375

First scrape all those pesky marshmallows off the top of the casserole. Maybe it's my upbringing or maybe it's my Canadieness, but I just don't get the whole marshmallow potato thing. Dispose of the marshmallows.

Mix your spices and crumbled feta into your potatoes... I did this to taste, amounts of spices will be determined in large part by the amount of casserole you have leftover. I would say that I had about 3 cups of mashed sweet potatoes. Regardless, taste your potatoes and if they taste good you have the correct amount of spices.

Place a teaspoon of filling in the center of your gyoza skin or wonton wrapper (these are pretty much the same thing. The gyoza's are round and are what I used). With these wrappers as well as most doughs you will use for dumplings, there is going to end up a "right" and "wrong" side of the dough. The wrong side will be more floury than the right. Keep the wrong side down towards your counter as the extra flour will make it hard to seal your dumplings.

Fill a small bowl with a little water. Dip your finger in (or use a pastry brush if you're super germophic) and spread a little water around the edge of your skin/wrapper. Fold in half and pinch to seal--the water will help the dough stick to itself.

Spray a baking pan with cooking spray and line up your dumplings. They are not going to rise or spread, so you have them pretty close together. Spray each dumpling with a 1 second of cooking spray. This helps them get crispy.

Bake for 5 minutes, flip, and bake for an additional 3 minutes. Serve with soy sauce for dipping.


The other leftover that I end up throwing out every year (and you would think I would learn to make less of...) is cranberry sauce. My friends aren't crazy about it so they don't eat much of it... which I feel is more a compliment to my gravy (which is always entirely consumed) than an insult to the cranberry.

Regardless, even after making some delicious turkey and cranberry sandwiches, I still had a good amount leftover. As I was making the sweet potato dumplings, I thought that a sweet dumpling would be a good compliment. Cranberry sauce itself seemed a little watery to fill a dumpling with so I added cream cheese (because what doesn't that make better?) and sealed them up within a wonton wrapper.

These didn't crisp as much and also got kind of explody in the oven their first batch. I think that while baking is healthier, these would probably be better if I had chilled them in the fridge and actually fried them. Next Thanksgiving!

Cranberry Rangoon

Ingredients

Half a cup of cranberry sauce
8oz cream cheese (I used the reduced fat kind)
40 wonton wrappers
Pam spray
powdered sugar (optional for dusting)

Directions

Preheat oven to 375
Mix cranberry sauce with cream cheese. I was lazy and used my food processor.

Put about 1 tsp of filling in the center of each wrapper. Use your tiny bowl of water to seal the edges. I folded mine into a triangle, and then took the two corners along the fold and folded them in to make what looked like an open envelope.

Place folded dumplings on a baking sheet sprayed with pam. Spray each dumpling for 1 second with cooking spray. Bake 4 minutes, flip, and bake an additional 3. Some of them will explode... they will still taste good.

While still warm, dust with powdered sugar if desired (this is more for prettiness).


These were both delicious (though I heavily preferred the sweet potato). They are, however, fairly time consuming to make as each little dumpling has to be assembled. I think this filling of savory sweet potatoes would also be super delicious in a ravioli form or even served on its own in lieu of a traditional sweet potato casserole. The cranberry sauce cream cheese mixture would also be tasty as a dip with crackers/fruit.

We are headed to the Renaissance Faire next Sunday, so it will be a Saturday snack with (perhaps) a faire theme!

Tuesday, October 11, 2011

Canadian Thanksgiving

This past weekend there were no snacks. I know, I was disappointed too.

Saturday we celebrated Canadian Thanksgiving at our place with our friends. This is becoming our event that we do every year. And every year it gets bigger! We actually had 16 people total, and our apartment is not super large. Luckily, we had beautiful weather and were able to utilize our porch area as well as the kitchen/living/dining area.
Sunday was Thanksgiving leftovers followed by a wedding where we were also fed a LOT. I swear I gained 5 lbs over the weekend... but it was sort of worth it by a factor of deliciousness.

So I am going to share my stuffing recipe and turkey recipes. Unfortunately before I could take pictures of my turkey and stuffing they were DEVOURED by my guests (I have Nathan trained not to eat the snacks until I've taken pictures). Trust me, they looked and tasted delicious.

This is from a cookbook... but we can assume my turkey looked the same.
Cornbread Sausage Stuffing

I never thought that I liked stuffing growing up because it got a weird texture and flavor. Then I discovered that you can put sausage in stuffing and my world was blown. Now I love stuffing. Also, you can make this up the point you put it in the turkey the night before which is really nice.

Ingredients
1 lb sweet italian sausage removed from casings
2 stalks celery, chopped
2 onions chopped
4 cloves garlic crushed
1 tbsp olive oil
6 tbsp unsalted butter
2 tsp poultry seasoning
2 boxes cornbread stuffing mix

Directions
Brown the sausage in a large skillet. When cooked, remove the sausage with a slotted spoon and set aside, leave drippings in the pan. Add olive oil and butter to sausage drippings and heat. Add onion, celery, and garlic. Cook in drippings until onion is translucent.

Meanwhile, put your cornbread stuffing in a large bowl and add poultry seasoning. Add cooked sausage and vegetables with all drippings to the cornbread stuffing and mix. You can stuff your turkey (recommended) or add some stock and bake.

Turkey

Ingredients
1 turkey (mine was 19.5lb) In general, you should purchase a lb of turkey per person... more if you like to have lots of leftovers.
half stick of butter
salt and pepper
garlic powder
cheese cloth (cheese cloth bags that you can find around thanksgiving are the best!)


Directions
Mix salt, pepper, and garlic powder with butter. I didn't measure the seasonings, you just want to flavor the butter a little. You could use other seasonings if you want.

Remove the neck and giblets from the turkey cavities. Rinse the turkey off and pat dry with paper towels.

You're going to be buttering your turkey now. The key to having a delicious, crispy, moist, flavorful turkey is to butter over the skin AND under the skin. At the openings to the cavities you can kind of get your hand between the skin and meat and if you need to you can cut some small slits in the skin to get your hand through. Butter your turkey!

Fill your cheesecloth bag (made or bought) with stuffing. Shove it inside the main cavity. Fill a smaller bag with more stuffing. Shove it inside the neck cavity.

Side note: It is easier to stuff a turkey without the cheesecloth bag, but it is really, really difficult to get all of your stuffing out of the turkey. By putting your stuffing inside of a cheescloth bag you have the benefit of having it cook inside your turkey (which makes it and your turkey more delicious) without try to scoop it out of your turkey when it molten lava hot. Turkey grease will burn you.

Preheat your oven to 350. Place your turkey BREAST SIDE DOWN in your roasting pan. Don't have a roasting pan? Well you should invest because it makes life easier and better. Plus if you try to use a foil one when you are lifting your enormous turkey out of the oven later it will be flexible and you will burn yourself with drippings when they spill out onto your semi-protected arm.

Oh, breast side down. Why? It looks upside down you say. The white meat of the breast will dry out long before the dark meat between the leg and body is cooked. By turning it upside down, instead of the moisture from the breast dripping down into the stuffing, all the juice from the stuffing and the dark meat is flowing down into the breast meat and keeping it moist and making it delicous.

Tent your turkey with tinfoil and bake 20mins per lb until meat thermometer reads a little below 170 (meat will continue to cook while resting). Let your turkey rest 15 minutes before carving.

Remove your stuffing and serve in a bowl.

Wednesday, October 5, 2011

Crostini

After the bacon bonanza of last week, I was feeling something a little bit lighter and fresher for this week. One of my all time favorite appetizers is bruschetta, specifically the kind made by my mother. I will, in fact, not order bruschetta is restaurants because it is inevitably disappointing. It is light and fresh and with this Sunday being heavily rooted in fall weather, it was a nice last taste of summer.

But the title of this post is not called bruchetta, it's crostini. Remember my delicious stuffed dates last week? Well I had a lot of left over blue cheese and pecan mixture and I wanted to use it as well, so I decided to make a second type of crostini with it.

Heather's Mom's Bruchetta
Mmmm... finished product


The absolute best part about this recipe is that every part of it can be made in advance... in fact it should be made at last a couple of hours in advance. If you're having a dinner party, this feature is going to be extremely attractive.

Ingredients

5 Roma Tomatoes--these tomatoes work best year-round because they have a more strong tomato flavor even when out of season. In prime tomato season, you can substitute any good tomato.
4 cloves garlic minced
handful fresh basil chopped (think about how much you think is enough... then add more)
1 Bell Pepper (I like green for the color contrast)
Pinch salt
1/4 cup olive oil plus more for bread
1/2 a French Baguette

Directions

Seed and chop your tomatoes into a petit dice. I find that to seed tomatoes, the easiest way is to cut the tomato into quarters lengthwise and then use my thumb to push the seeds out.


Chop the bell pepper into similar size pieces as the tomato and add both to a bowl. Add chopped garlic and basil. Add olive oil. Stir to mix. DO NOT ADD THE SALT Trust me... you want good, delicious bruschetta, you don't want to add the salt at this point. It will draw out all the moisture from your tomatoes and pepper and make your bruschetta soupy and gross.
Leftover tomato mixture is good on pasta too!

Cover your bowl with plastic wrap and leave sitting on the counter or in the fridge until ready to use.


In the meantime, preheat your broiler to medium heat. Place one of the racks in the 2nd highest position.
Slice your baguette into about half inch slices. You can do this on a fancy angle if you want... Discard (eat) the heels of the bread.

Take a pastry brush (you know, for basting and butter and stuff... I don't know the fancy term for it!) and spread olive oil on one side of the slices of bread. Arrange them on a baking sheet oil side up.

Place under the broiler. Watch carefully... They will take about 2 minutes to toast, but the difference between beautiful golden toast and horrible blackened charcoal can be the matter of seconds. I check every 30 seconds, look at the pieces in the back of the oven. Flip over the bread and toast the second side.
slice it (front) oil it (right) toast it (left) mmm bread!
Hours have past and you are ready to assemble and serve your bruschetta. Place your toasted rounds on a plate oil side up. Put a heaping spoonful of bruschetta on each round. Take your salt and sprinkle it over the bruschetta. Serve immediately.


Now some people are going to say "but Heather, I put cheese, balsamic vinegar, no peppers etc. etc. in MY bruschetta and it's super delicious!". Good for you... that's not how I do it and it's not how my mom does it and if you want to start going after my mom we're going to be in a fight.

Blue Cheese Apple Crostini

As I mentioned, I wanted to use up the extra blue cheese and pecan mixture from last week. It wasn't very spreadable, so I mixed it with some cream cheese. To cut the heaviness of the blue cheese, I added some nice granny smith apple slices that really gave it a nice tart compliment.

Ingredients

Blue cheese and pecan mixture from bacon day (see previous post)
4oz softened cream cheese (I used the low fat kind)
1 granny smith apple
1/2 a French baguette cut into 1/2 inch slices
tsp lime juice

Directions

Preheat oven to 350 degrees.
Mix the blue cheese and the cream cheese together. I did so in a food processor, but probably could have done it with a fork.Spread mix over slices of bread. Place on baking sheet and bake for about 12 minutes until edges of bread are toasted.

While baking, slice granny smith into thin slices. In a small bowl mix lime juice with about 1/4 cup of water. Immerse slices of apple in the lime bath to keep them from browning.

Place two slices of apple into each crostini.

These are good hot or cold. They can be made about 2 hours in advance, but the apple slices will start to wilt after that.

gravity defying apple slices!
Both of these were delicious, and the bruschetta was different enough from the blue cheese crostini as far as both flavor and texture that it wasn't overwhelming. I would make either of them again.

Monday, September 26, 2011

Bacon Versatility

You know what's delicious? Bacon. You know what's bad for you? Also, sadly, bacon.

As a general rule I would never make this snack day in its entirety again. And that is because for the 5 recipes that I made, I used 1.5lbs of bacon... It was a little bit too much. Some of what I made I didn't like and will show pictures of, but don't feel the necessity to type out recipes for. Somethings just didn't work.

Fun fact: Apple slices wrapped in bacon will explode  long before the bacon is finished.


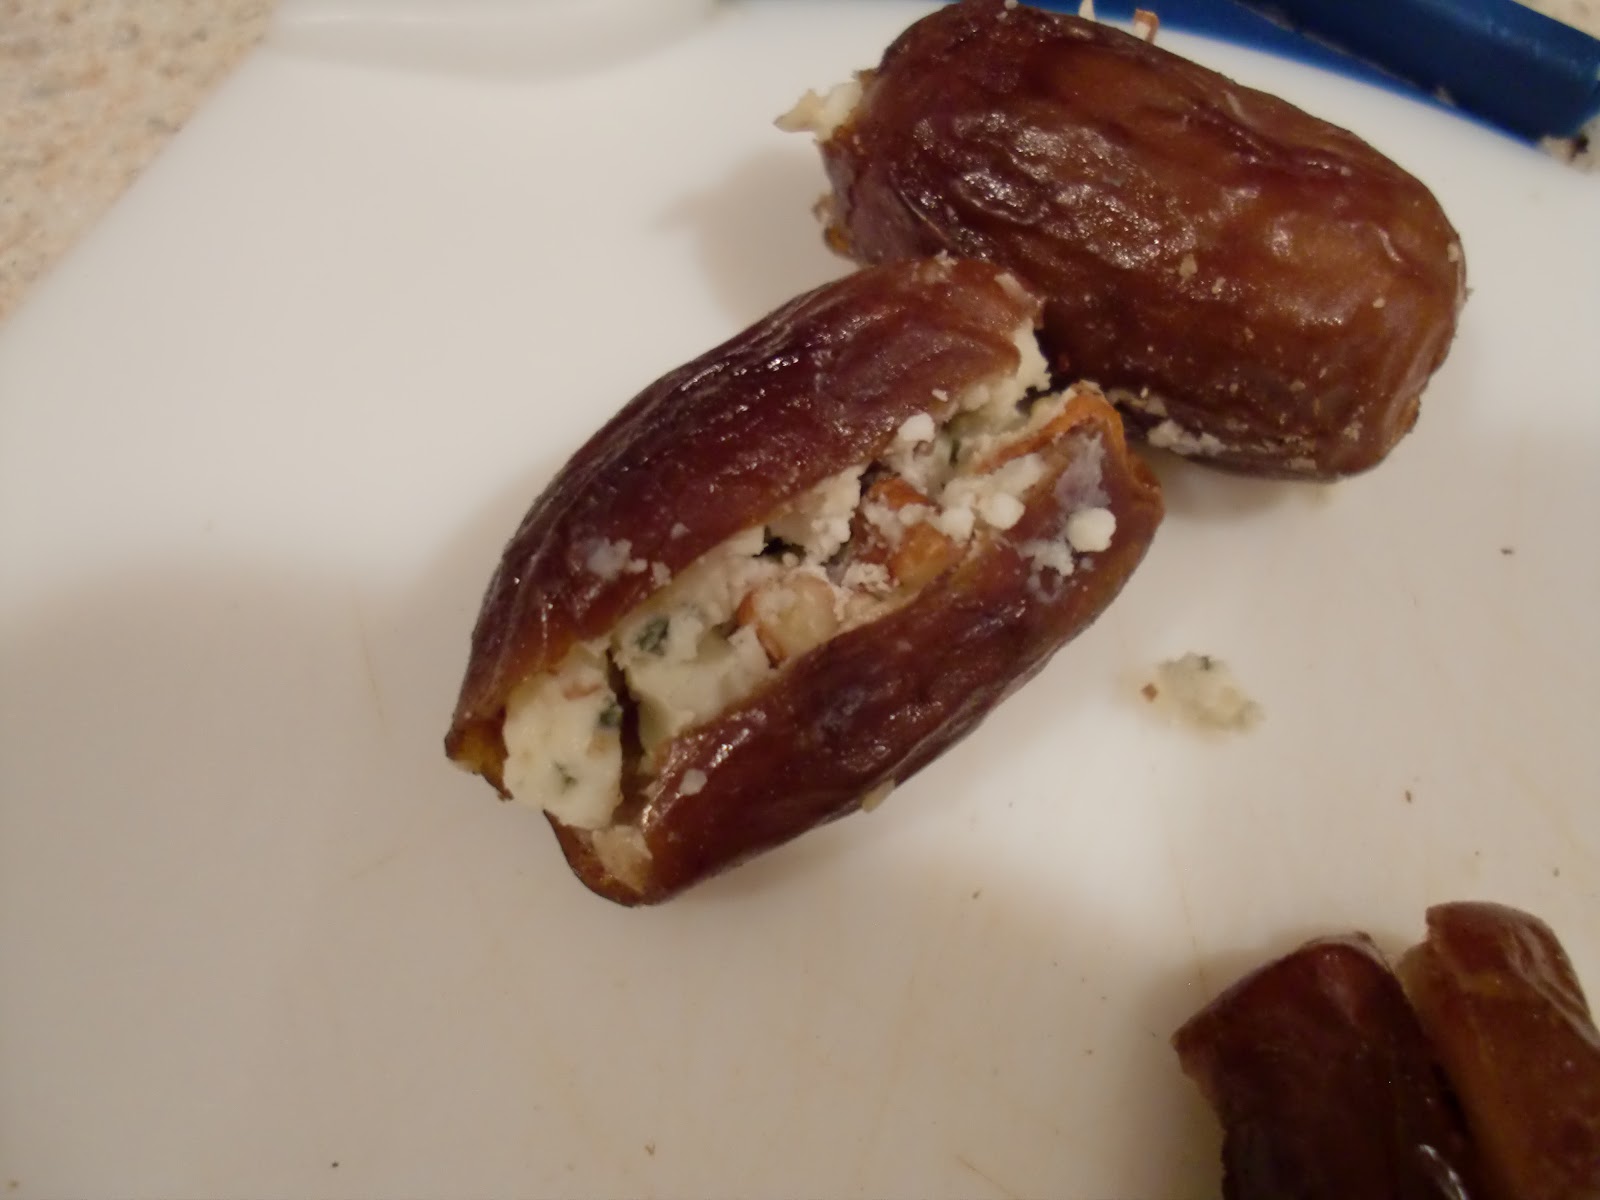
Blue-Cheese Stuffed Dates... Wrapped in Bacon

Remember last week as I used delicious blue cheese stuffed olives? Well blue cheese is delicious and not limited to stuffing only a single item. This time I did the stuffing myself. I thought that this might seem like a daunting task for those less familiar with cooking so I thought ahead and actually took some pictures of the process as well.

All you need is a knife, a chopping block and your ingredients.

Ingredients
Pitted Dates--I had about 2 dozen
Blue Cheese--you can use part of a block, but I used about half of a container of the crumbled stuff
Pecans, about half a cup chopped coarsely
Bacon--about half a package with slices cut into thirds.

Directions
Preheat oven to 375F

Mix your blue cheese and chopped up pecans. I sort of mushed them together with a fork.
I actually mixed about twice as much as I needed... have to find something delicious for leftovers
Take your dates and slice length wise through one side. Since you have pitted dates there will probably be a hole somewhere where the date was removed. I like to use that hole as my starting point since otherwise when you go to stuff the date there's a hole in it if you don't.

Try not to eat delicious dates.
You may be tempted to hold the date in your hand and slice it up in the air because you're tall and the counter is slightly too low to be really comfortable to cut on... resist that urge! Because, somewhat strangely, you can miss the date and slice your finger. Hurting yourself is bad. People also will generally not be fans of eating your blood. Unless you hang out with an "alternative" crowd... then slice away.

ouch!

Fill the date with a pinch of blue cheese mixture and close up... Because they're sticky they stay closed on their own and don't really need a tooth pick or anything.
ta da!
Wrap each date with a third a slice of bacon. A lot of recipes that deal with bacon wrapped goods seem to think that you must secure the bacon with a toothpick. You really don't. The fat in the bacon is sort of stretchy to get a tight fit and also sticks to itself. Kind of like pork-plastic wrap.

Place the dates on a jelly roll pan or in a baking dish. Bake for 18 minutes (approximately) flip and bake another 5 minutes.

While not the most colorful and attractive appetizer, these are one of the most delicious things I've ever made. They are sweet, salty, creamy, and crunchy in just the right proportion. Plus they're easy and seem fancier than they are.

Bacon Breadsticks

This was really tasty and just ridiculously easy to make. Nathan (my husband) really liked them and I think they are a terrific "man food".

Ingredients
Sesame Breadsticks (I found them with the fancy crackers)
Bacon cut in half

Directions

Pre-heat oven to 400F

Wrap each bread stick with bacon. Place on a baking sheet with sides. Bake10 minutes. Flip and bake another 5 minutes.

Place on paper towel lined plate and let cool. If you eat them right out of the oven they are soggy.

Eat plain or dip in some spicy mustard.

 I also made some bacon wrapped water chestnuts which I didn't particularly care for (Nathan ate the whole thing), bacon wrapped shrimp, and bacon wrapped scallops.

I wouldn't make any of them again (didn't like the scallops at all... not sure if it was me or the scallops or the cooking method) so I'm not going to take the time to share the recipes (in brief, wrap with bacon, bake). I'll post a link to the water chestnut recipe in case anyone thinks that sounds appealing.

Nathan with bacon-wrapped feast
Next week I think I'm going to on the less fatty side of things, especially since Saturday we will be enjoying the Pennsylvania Renaissance Festival which is already full of less than healthy items.

bacon wrapped water chestnuts

Monday, September 19, 2011

Sunday on a Stick

As I was searching for new and exciting recipes last week, I came across these potato pinchos from the food network. While they look delicious (and I may eventually try them out) what I really liked about them was the fact that they were on toothpicks. Nothing says classy like being served on a stick.

Eventually I decided to stick (get it) with two different recipes. The first choice was due mostly to the fact that I bought a couple of sweet potatoes earlier in the week and needed to use them.

Behold sweet potato sausage bites!


I had a really hard time getting my camera to focus on them...
 These were awesomely easy, and I also made them healthier!
Ingredients:
1 sweet potato washed
half a package smoked sausage.. about 7 oz (I used Hillshire Smoked Turkey Sausage... see? healthy.)
pinch of cayenne pepper
1 tbsp olive oil
salt and pepper

for sauce
1/2 cup mayo (I used reduced fat)
1 T lemon juice
1 tsp garlic (I used the pre-minced kind you get in a jar 'cause I was too lazy to chop)
1 T minced parsley

Directions
Preheat your oven to 450F
Cut your sweet potato into half inch "cubes". You'll notice that since the potato itself is round you don't get 100% as squares or rectangles. This is ok, they will taste delicious.

Put your cubes in a bowl and toss with olive oil, salt, and pepper. Spread across a greased baking sheet.
Bake for about 15-20mins, turning two or three times. They will get sorta carmelized and extra delicious

While your sweet potato is baking slice up your sausage. I did about half inch slices and then halved them so they are half circles. Place your sausage in a hot pan and sprinkle with the cayenne pepper. Alternately you could have bought spicy sausage and just left out the cayenne...

Let the sausage brown on both sides, it will only a minute or two per side.


Make your dipping sauce! These are totally delicious with no sauce at all, so if you're looking to cut your calories even further you can just not make it. Mix all ingredients. Store in fridge. This is actually best if it can sit a little bit to let the flavors meld, so feel free to make it the night before you want your snack.

Skewer your potato and sausage. I did it potato on the bottom, but you could put the sausage on the bottom.

These are good hot, and also good at room temperature so they're awesome for those of us who like to make things a little in advance and eat them throughout an extended period. I would make these exactly the same again and again because they were a great blend of sweet and salty with a bit of spice.

I also made Tortellini Salad Skewers

Ingredients
1 package frozen toretllini (cheese or meat your choice!)
1 package grape or cherry tomatoes
Olives--I used blue cheese stuffed olives from the fancy olive bar at my grocery store about 1/2 lb
1/2 cup vinagrette style dressing--I used Zesty Italian

Directions
Cook about 40 tortellini according to package directions. Drain and rinse with cold water. Set aside.
Halve 20 tomatoes and all of your olives.

Skewer half a tomato, a tortellini, and an olive half on each skewer.

Place skewers in a 9x13 dish. Pour dressing over top. Let sit in fridge for a few hours (I left mine overnight). Remove skewers from dish to a separate serving tray. Discard excess dressing.

Eat!

Here was my issue with this recipe... the olive was super over powering. I ended up eating the olives in one bite (because blue cheese stuffed olives are AMAZING. go eat one right now) and then the tomato and tortellini together in another. This was partially my bad because if you look at my reference recipes below you'll see that it in fact called for snow peas instead of olives but I was thinking a mediterranean flair would be tasty...I think if it were to make this into an actual salad vs a skewered salad I would still include the olives but have significantly higher proportion of tortellini and tomato.